
Getting to know the editor
Before making your first game, it’s worth getting to know the place where you will spend most of your time. This is Brasa with a project open:
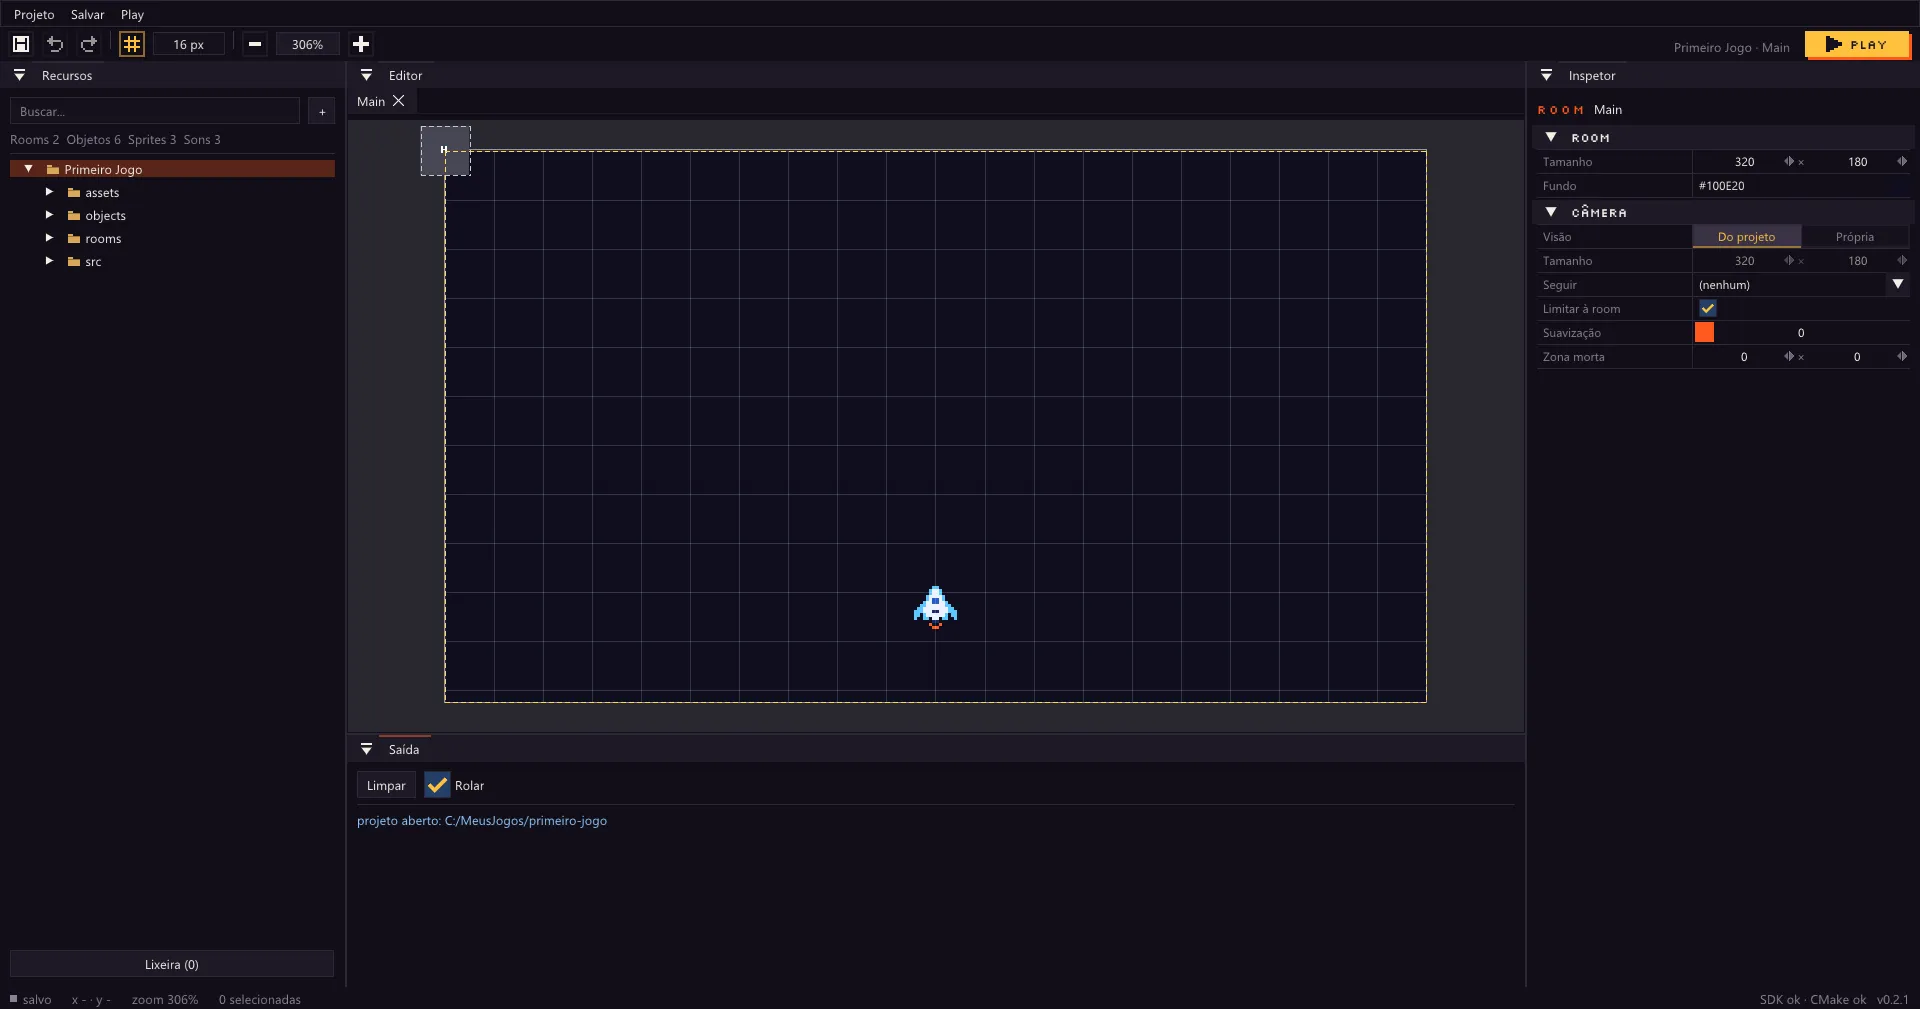
The parts of the editor
Section titled “The parts of the editor”- Toolbar (at the top). Save, undo, redo, the grid, the zoom and, on the right, the Play button. Play saves everything, compiles the game and opens it in a window. The shortcut is F5.
- Recursos (Resources, on the left). All the files of the project, in folders: objects, rooms, sprites, sounds and code. You can search, create folders and drag files from Windows into it. Learn more.
- Editor (in the middle). Shows what you opened, each thing in its own tab. A room appears as a grid, where you drag and position objects. A sprite opens the sprite editor. Learn more about the room.
- Inspetor (Inspector, on the right). Shows the properties of what is selected: the size and the camera of the room, the position of an instance or the sprite of an object. Learn more.
- Saída (Output, at the bottom). Messages from the editor and the compiler. When the code has an error, it shows up here. Learn more.
- Status bar (at the very bottom). Says whether the project is salvo (saved) or não salvo (not saved), the mouse position in the room, the zoom and whether the SDK and CMake are ready.
Create a project
Section titled “Create a project”In the hub, click + Novo (new):
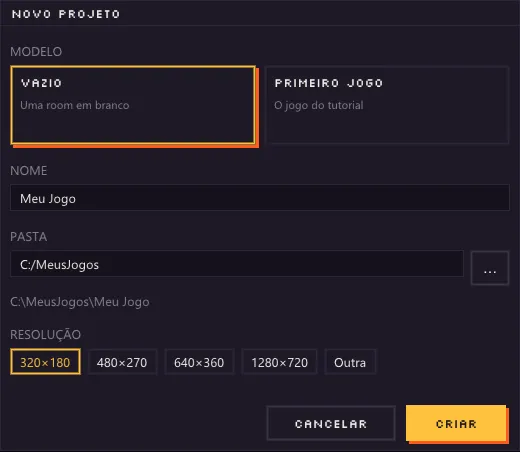
- Modelo (template): Vazio (empty) starts with a blank room. Primeiro Jogo (first game) already comes with the finished spaceship game from the tutorial.
- Nome (name) and Pasta (folder): where the project will be on your computer.
- Resolução (resolution): the size of the game screen, in pixels. Small resolutions, such as 320×180, make the pixel art big and crisp. The game window adjusts itself to the monitor.
Click Criar (create) and the project opens in the editor.
Next step
Section titled “Next step”Now that you know the editor, make your first game.